Elixir and Kubernetes: Deploying Aristochat
In the second post in this series, we launched our Kubenetes cluster. Today, we’ll actually start running our application, Aristochat.
Our first step towards launching Aristochat is to take our application and get it into a container so that we can deploy it to our cluster. The tools we’re going to use here are add-ons to Mix, Elixir’s build tool. We use Mix to run our server locally, execute tests, generate projects, and more. As part of installing Elixir and setting up a Phoenix project, we should already have Mix installed. We’re going to generate an Erlang release that creates a deployable package via Distillery and containerize it via a tool called mix-edib. Mix-edib (Elixir Docker image builder) is a Mix task that allows us to easily create a docker image for our Aristochat server.
To kick this process off, we need to get all of our components in place. If you don’t already, grab Aristochat and the Aristochat client from Github. We should already have Mix installed, but if you don’t, it comes bundled with Elixir.
In mix.exs, we need to add Distillery to our dependencies.
defp deps do
  [{:distillery, "~> 1.4"}]
end
We’ll need to follow this up with a mix deps.get on the command line to fetch our new dependencies.
To install mix-edib, we can run this command in a terminal:
mix archive.install https://git.io/edib-0.10.0.ezOnce we’ve got these components installed, our first step is to use Distillery to generate our release.
First, we need to initialize the release file, which we can achieve by running mix release.init.
This generates a release file that is stored in rel/config.exs.
We’re going to run with the defaults for now, but I suggest you open it up and take a look.
Elixir and Phoenix are really great at documenting all the various configurations inline, which help give a sense of what we can do with releases.
To generate our release and run it in a container, we’ll use edib – our recently downloaded mix task.
mix edib --name bo.ingram/aristochat --tag initialThis will install Aristochat in a container with the given name and tag. Now, we can finally do what we’ve been talking about and put our app in Kubernetes.
To get our app deployed to Kubernetes, we’ll want to create two things – a deployment and a service. Kubernetes uses YAML files to describe the configuration and operations we want it to perform. This is the file we’ll be using to deploy Aristochat.
apiVersion: apps/v1beta1
kind: Deployment
metadata:
  name: aristochat
spec:
  replicas: 3
  template:
    metadata:
      labels:
        app: aristochat
    spec:
      containers:
        - name: aristochat
          image: boingram/aristochat:initial
          env:
            - name: PORT
              value: '4000'
          ports:
            - containerPort: 4000
              name: 'phoenix-port'
---
apiVersion: v1
kind: Service
metadata:
  name: aristochat
  labels:
    app: aristochat
    tag: initial
spec:
  ports:
    - port: 80
      targetPort: 4000
      name: 'phoenix-port'
  selector:
    app: aristochat
A deployment provides declarative updates for pods, the base unit of scheduling in Kubernetes. A pod is made up of one or more containers. In our deployment, we define the labels we want the app to have. We’ll give it an app tag called ‘aristochat’. In the spec section, we define the containers we want to run. We want to run our recently created Aristochat container, and we want it to expose port 4000, which we’ve told the app to listen on via an environment variable.
A service defines a grouping of pods and gives a way to access them. It defines the set of pods via the selector. We tell our service to only care about pods with the app label of ‘aristochat’. We define the port to forward to on the container, as well as an ingress port.
Let’s actually launch the thing! We’ll pass in the above yaml file to kubectl, and Kubernetes will take it from there. If you’re following along from home, the file we’re about to launch is in the Aristochat repo.
kubectl create -f k8s/intial.yamlGive it a second, and then run kubectl get pods -l app=aristochat.
This should show us three pods successfully running Aristochat.
If you run kubectl get services, you should see our Aristochat service taking in traffic in port 80 and forwarding it to a random port in the cluster.
Let’s connect to our server now and send some messages!
If you’re running in Minikube, you can connect to our server via the command line client by running the following command in the client’s directory:
go run cmd/app/main.go --username <USER> --room <ROOM> --server $(minikube service aristochat --url)If you’re running your Kubernetes cluster elsewhere, you can substitute the service URL and port for the Minikube argument.
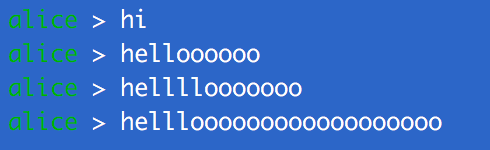
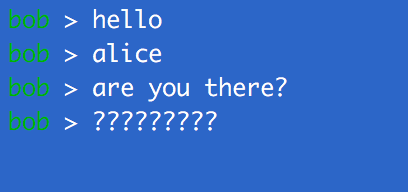
I’ve fired up two clients – one for Alice and one for Bob. We’ve got a problem though. Despite the fact they specified the same chat room, they can’t see each other’s messages! Not great.
Part of the reason to use Elixir is its power in running distributed systems. Elixir supports joining its nodes together in a cluster. For a chat server, this clustering is very helpful – it enables messages to be shared with all users in a chatroom, no matter the server they initially hit. Aristochat isn’t clustered yet, so that’s why Bob is unable to see Alice’s messages and vice vesra. We need to get to this state, and we’ll use yet another tool to get us there – libcluster.
Libcluster is a library for Elixir that aids in automatically creating clusters of Elixir nodes. It has a variety of built-in configurations, and luckily for of us, one of those is for Kubernetes. Like most new libraries, we’ll add it to Aristochat’s dependencies in mix.exs:
defp deps do
  [{:libcluster, "~> 2.1"}]
end
Don’t forget to run mix deps.get!
We’ll also want to add libcluster to the list of applications our app is going to run.
def application do
    [mod: {Aristochat, []},
     applications: [:phoenix, :phoenix_pubsub, :phoenix_html, :cowboy, :logger, :gettext, :libcluster]]
end
Adding libcluster here tells Aristochat to run libcluster when it starts up.
We now need to add configuration for libcluster so that it knows to use Kubernetes and how to cluster our app. Phoenix provides config files for our different environments. I’m pretending we’re running in production, so let’s edit our production config (config/prod.exs). We’ll add the following config block to tell libcluster to use Kubernetes.
config :libcluster,
  topologies: [
    k8s: [
      strategy: Cluster.Strategy.Kubernetes,
      config: [
        kubernetes_selector: "app=aristochat",
        kubernetes_node_basename: "aristochat"
      ]
    ]
  ]
Earlier, we discussed how the service we defined would provide access to all apps in our cluster with the tag ‘app=aristochat’. Libcluster leverages selectors, just like Kubernetes services, to provide clustering for our app. We tell libcluster to select the apps with the ‘app=aristochat’ tag. We also specify a node base name to use when libcluster starts naming nodes. To facilitate this process, we’re going to need to add some things to our Kubernetes template.
apiVersion: apps/v1beta1
kind: Deployment
metadata:
  name: aristochat
spec:
  replicas: 3
  template:
    metadata:
      labels:
        app: aristochat
    spec:
    containers:
      - name: aristochat
        image: boingram/aristochat:initial_clustered
        imagePullPolicy: Always
        env:
          - name: PORT
            value: '4000'
          - name: REPLACE_OS_VARS
            value: 'true'
          - name: MY_POD_IP
            valueFrom:
              fieldRef:
              fieldPath: status.podIP
        ports:
          - containerPort: 4000
            name: 'phoenix-port'
---
apiVersion: v1
kind: Service
metadata:
  name: aristochat
  labels:
    app: aristochat
spec:
  type: LoadBalancer
  ports:
    - port: 80
      targetPort: 4000
      name: 'phoenix-port'
  selector:
    app: aristochat
We’ve added a few environment variables that libcluster, running inside of Aristochat,
will pick up and use.
REPLACE_OS_VARS lets Aristochat use environment variables to configure itself.
Since we just passed it a few environment variables, we definitely need this to be true, otherwise we can’t use our cool new environment variables.
The other field is MY_POD_IP.
Kubernetes allows us to expose some variables as environment variables, such as the running pod’s IP address.
By passing this variable to Aristochat, it can advertise its IP and get traffic from other Aristochat nodes.
The last thing we need to do is specify some arguments that we’ll pass to the Erlang VM to configure our release.
We’ll do this in a vm.args file in which we’ll specify two things: the node’s name and the Erlang cookie, a secret token to enable clustering with the other nodes.
-name aristochat@${MY_POD_IP}
-setcookie <COOKIE GOES HERE>
When we do our Distillery release and package it up into a container again, our vm.args file will be included. The environment variable for our pod’s IP address will be populated, and hopefully, our nodes will be clustered and communicating with each other. Let’s try it out!
I’ve redeployed our app to the Kubernetes cluster and started clients for Alice and Bob.
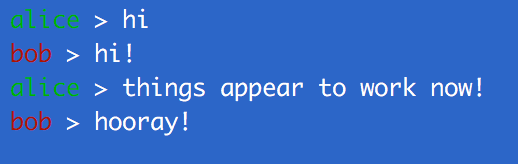
Libcluster worked its magic and now Alice and Bob aren’t forced to rely on the lottery of both ending up on the same server! Alice can send her messages to server A, and Elixir will handle sending those messages out to the other clients connected on servers B and C. This would be a good chunk of work in other languages, but thanks to the power of Elixir and Phoenix and an assist from Kubernetes networking, we can implement clustering with minimal effort.